
idx: The Existential Function

· 2 min read
Timothy Yung
Engineering Manager at Facebook

At Facebook, we often need to access deeply nested values in data structures fetched with GraphQL. On the way to accessing these deeply nested values, it is common for one or more intermediate fields to be nullable. These intermediate fields may be null for a variety of reasons, from failed privacy checks to the mere fact that null happens to be the most flexible way to represent non-fatal errors.

Unfortunately, accessing these deeply nested values is currently tedious and verbose.

props.user &&
props.user.friends &&
props.user.friends[0] &&
props.user.friends[0].friends;

There is an ECMAScript proposal to introduce the existential operator which will make this much more convenient. But until a time when that proposal is finalized, we want a solution that improves our quality of life, maintains existing language semantics, and encourages type safety with Flow.

We came up with an existential function we call idx.

idx(props, _ => _.user.friends[0].friends);

The invocation in this code snippet behaves similarly to the boolean expression in the code snippet above, except with significantly less repetition. The idx function takes exactly two arguments:

  • Any value, typically an object or array into which you want to access a nested value.
  • A function that receives the first argument and accesses a nested value on it.

In theory, the idx function will try-catch errors that are the result of accessing properties on null or undefined. If such an error is caught, it will return either null or undefined. (And you can see how this might be implemented in idx.js.)

In practice, try-catching every nested property access is slow, and differentiating between specific kinds of TypeErrors is fragile. To deal with these shortcomings, we created a Babel plugin that transforms the above idx invocation into the following expression:

props.user == null
? props.user
: props.user.friends == null
? props.user.friends
: props.user.friends[0] == null
? props.user.friends[0]
: props.user.friends[0].friends;

Finally, we added a custom Flow type declaration for idx that allows the traversal in the second argument to be properly type-checked while permitting nested access on nullable properties.

The function, Babel plugin, and Flow declaration are now available on GitHub. They are used by installing the idx and babel-plugin-idx npm packages, and adding “idx” to the list of plugins in your .babelrc file.

Introducing Create React Native App

· 2 min read
Adam Perry
Software Engineer at Expo

Today we’re announcing Create React Native App: a new tool that makes it significantly easier to get started with a React Native project! It’s heavily inspired by the design of Create React App and is the product of a collaboration between Facebook and Expo (formerly Exponent).

Many developers struggle with installing and configuring React Native’s current native build dependencies, especially for Android. With Create React Native App, there’s no need to use Xcode or Android Studio, and you can develop for your iOS device using Linux or Windows. This is accomplished using the Expo app, which loads and runs CRNA projects written in pure JavaScript without compiling any native code.

Try creating a new project (replace with suitable yarn commands if you have it installed):

$ npm i -g create-react-native-app
$ create-react-native-app my-project
$ cd my-project
$ npm start

This will start the React Native packager and print a QR code. Open it in the Expo app to load your JavaScript. Calls to console.log are forwarded to your terminal. You can make use of any standard React Native APIs as well as the Expo SDK.

What about native code?

Many React Native projects have Java or Objective-C/Swift dependencies that need to be compiled. The Expo app does include APIs for camera, video, contacts, and more, and bundles popular libraries like Airbnb’s react-native-maps, or Facebook authentication. However if you need a native code dependency that Expo doesn’t bundle then you’ll probably need to have your own build configuration for it. Just like Create React App, “ejecting” is supported by CRNA.

You can run npm run eject to get a project very similar to what react-native init would generate. At that point you’ll need Xcode and/or Android Studio just as you would if you started with react-native init , adding libraries with react-native link will work, and you’ll have full control over the native code compilation process.

Questions? Feedback?

Create React Native App is now stable enough for general use, which means we’re very eager to hear about your experience using it! You can find me on Twitter or open an issue on the GitHub repository. Pull requests are very welcome!

Using Native Driver for Animated

· 7 min read
Janic Duplessis
Software Engineer at App & Flow

For the past year, we've been working on improving performance of animations that use the Animated library. Animations are very important to create a beautiful user experience but can also be hard to do right. We want to make it easy for developers to create performant animations without having to worry about some of their code causing it to lag.

What is this?

The Animated API was designed with a very important constraint in mind, it is serializable. This means we can send everything about the animation to native before it has even started and allows native code to perform the animation on the UI thread without having to go through the bridge on every frame. It is very useful because once the animation has started, the JS thread can be blocked and the animation will still run smoothly. In practice this can happen a lot because user code runs on the JS thread and React renders can also lock JS for a long time.

A bit of history...

This project started about a year ago, when Expo built the li.st app on Android. Krzysztof Magiera was contracted to build the initial implementation on Android. It ended up working well and li.st was the first app to ship with native driven animations using Animated. A few months later, Brandon Withrow built the initial implementation on iOS. After that, Ryan Gomba and myself worked on adding missing features like support for Animated.event as well as squash bugs we found when using it in production apps. This was truly a community effort and I would like to thanks everyone that was involved as well as Expo for sponsoring a large part of the development. It is now used by Touchable components in React Native as well as for navigation animations in the newly released React Navigation library.

How does it work?

First, let's check out how animations currently work using Animated with the JS driver. When using Animated, you declare a graph of nodes that represent the animations that you want to perform, and then use a driver to update an Animated value using a predefined curve. You may also update an Animated value by connecting it to an event of a View using Animated.event.

Here's a breakdown of the steps for an animation and where it happens:

  • JS: The animation driver uses requestAnimationFrame to execute on every frame and update the value it drives using the new value it calculates based on the animation curve.
  • JS: Intermediate values are calculated and passed to a props node that is attached to a View.
  • JS: The View is updated using setNativeProps.
  • JS to Native bridge.
  • Native: The UIView or android.View is updated.

As you can see, most of the work happens on the JS thread. If it is blocked the animation will skip frames. It also needs to go through the JS to Native bridge on every frame to update native views.

What the native driver does is move all of these steps to native. Since Animated produces a graph of animated nodes, it can be serialized and sent to native only once when the animation starts, eliminating the need to callback into the JS thread; the native code can take care of updating the views directly on the UI thread on every frame.

Here's an example of how we can serialize an animated value and an interpolation node (not the exact implementation, just an example).

Create the native value node, this is the value that will be animated:

NativeAnimatedModule.createNode({
id: 1,
type: 'value',
initialValue: 0,
});

Create the native interpolation node, this tells the native driver how to interpolate a value:

NativeAnimatedModule.createNode({
id: 2,
type: 'interpolation',
inputRange: [0, 10],
outputRange: [10, 0],
extrapolate: 'clamp',
});

Create the native props node, this tells the native driver which prop on the view it is attached to:

NativeAnimatedModule.createNode({
id: 3,
type: 'props',
properties: ['style.opacity'],
});

Connect nodes together:

NativeAnimatedModule.connectNodes(1, 2);
NativeAnimatedModule.connectNodes(2, 3);

Connect the props node to a view:

NativeAnimatedModule.connectToView(3, ReactNative.findNodeHandle(viewRef));

With that, the native animated module has all the info it needs to update the native views directly without having to go to JS to calculate any value.

All there is left to do is actually start the animation by specifying what type of animation curve we want and what animated value to update. Timing animations can also be simplified by calculating every frame of the animation in advance in JS to make the native implementation smaller.

NativeAnimatedModule.startAnimation({
type: 'timing',
frames: [0, 0.1, 0.2, 0.4, 0.65, ...],
animatedValueId: 1,
});

And now here's the breakdown of what happens when the animation runs:

  • Native: The native animation driver uses CADisplayLink or android.view.Choreographer to execute on every frame and update the value it drives using the new value it calculates based on the animation curve.
  • Native: Intermediate values are calculated and passed to a props node that is attached to a native view.
  • Native: The UIView or android.View is updated.

As you can see, no more JS thread and no more bridge which means faster animations! 🎉🎉

How do I use this in my app?

For normal animations the answer is simple, just add useNativeDriver: true to the animation config when starting it.

Before:

Animated.timing(this.state.animatedValue, {
toValue: 1,
duration: 500,
}).start();

After:

Animated.timing(this.state.animatedValue, {
toValue: 1,
duration: 500,
useNativeDriver: true, // <-- Add this
}).start();

Animated values are only compatible with one driver so if you use native driver when starting an animation on a value, make sure every animation on that value also uses the native driver.

It also works with Animated.event, this is very useful if you have an animation that must follow the scroll position because without the native driver it will always run a frame behind of the gesture because of the async nature of React Native.

Before:

<ScrollView
scrollEventThrottle={16}
onScroll={Animated.event(
[{ nativeEvent: { contentOffset: { y: this.state.animatedValue } } }]
)}
>
{content}
</ScrollView>

After:

<Animated.ScrollView // <-- Use the Animated ScrollView wrapper
scrollEventThrottle={1} // <-- Use 1 here to make sure no events are ever missed
onScroll={Animated.event(
[{ nativeEvent: { contentOffset: { y: this.state.animatedValue } } }],
{ useNativeDriver: true } // <-- Add this
)}
>
{content}
</Animated.ScrollView>

Caveats

Not everything you can do with Animated is currently supported in Native Animated. The main limitation is that you can only animate non-layout properties, things like transform and opacity will work but Flexbox and position properties won't. Another one is with Animated.event, it will only work with direct events and not bubbling events. This means it does not work with PanResponder but does work with things like ScrollView#onScroll.

Native Animated has also been part of React Native for quite a while but has never been documented because it was considered experimental. Because of that make sure you are using a recent version (0.40+) of React Native if you want to use this feature.

Resources

For more information about animated I recommend watching this talk by Christopher Chedeau.

If you want a deep dive into animations and how offloading them to native can improve user experience there is also this talk by Krzysztof Magiera.

A Monthly Release Cadence: Releasing December and January RC

· 2 min read
Eric Vicenti
Engineer at Facebook

Shortly after React Native was introduced, we started releasing every two weeks to help the community adopt new features, while keeping versions stable for production use. At Facebook we had to stabilize the codebase every two weeks for the release of our production iOS apps, so we decided to release the open source versions at the same pace. Now, many of the Facebook apps ship once per week, especially on Android. Because we ship from master weekly, we need to keep it quite stable. So the bi-weekly release cadence doesn't even benefit internal contributors anymore.

We frequently hear feedback from the community that the release rate is hard to keep up with. Tools like Expo had to skip every other release in order to manage the rapid change in version. So it seems clear that the bi-weekly releases did not serve the community well.

Now releasing monthly

We're happy to announce the new monthly release cadence, and the December 2016 release, v0.40, which has been stabilizing for all last month and is ready to adopt. (Just make sure to update headers in your native modules on iOS).

Although it may vary a few days to avoid weekends or handle unforeseen issues, you can now expect a given release to be available on the first day of the month, and released on the last.

Use the current month for the best support

The January release candidate is ready to try, and you can see what's new here.

To see what changes are coming and provide better feedback to React Native contributors, always use the current month's release candidate when possible. By the time each version is released at the end of the month, the changes it contains will have been shipped in production Facebook apps for over two weeks.

You can easily upgrade your app with the new react-native-git-upgrade command:

npm install -g react-native-git-upgrade
react-native-git-upgrade 0.41.0-rc.0

We hope this simpler approach will make it easier for the community to keep track of changes in React Native, and to adopt new versions as quickly as possible!

(Thanks go to Martin Konicek for coming up with this plan and Mike Grabowski for making it happen)

Easier Upgrades Thanks to Git

· 4 min read
Nicolas Cuillery
JavaScript consultant and trainer at Zenika

Upgrading to new versions of React Native has been difficult. You might have seen something like this before:

None of those options is ideal. By overwriting the file we lose our local changes. By not overwriting we don't get the latest updates.

Today I am proud to introduce a new tool that helps solve this problem. The tool is called react-native-git-upgrade and uses Git behind the scenes to resolve conflicts automatically whenever possible.

Usage

Requirement: Git has to be available in the PATH. Your project doesn't have to be managed by Git.

Install react-native-git-upgrade globally:

$ npm install -g react-native-git-upgrade

or, using Yarn:

$ yarn global add react-native-git-upgrade

Then, run it inside your project directory:

$ cd MyProject
$ react-native-git-upgrade 0.38.0

Note: Do not run 'npm install' to install a new version of react-native. The tool needs to be able to compare the old and new project template to work correctly. Simply run it inside your app folder as shown above, while still on the old version.

Example output:

You can also run react-native-git-upgrade with no arguments to upgrade to the latest version of React Native.

We try to preserve your changes in Android and iOS build files, so you don't need to run react-native link after an upgrade.

We have designed the implementation to be as little intrusive as possible. It is entirely based on a local Git repository created on-the-fly in a temporary directory. It won't interfere with your project repository (no matter what VCS you use: Git, SVN, Mercurial, ... or none). Your sources are restored in case of unexpected errors.

How does it work?

The key step is generating a Git patch. The patch contains all the changes made in the React Native templates between the version your app is using and the new version.

To obtain this patch, we need to generate an app from the templates embedded in the react-native package inside your node_modules directory (these are the same templates the react-native init commands uses). Then, after the native apps have been generated from the templates in both the current version and the new version, Git is able to produce a patch that is adapted to your project (i.e. containing your app name):

[...]

diff --git a/ios/MyAwesomeApp/Info.plist b/ios/MyAwesomeApp/Info.plist
index e98ebb0..2fb6a11 100644
--- a/ios/MyAwesomeApp/Info.plist
+++ b/ios/MyAwesomeApp/Info.plist
@@ -45,7 +45,7 @@
<dict>
<key>localhost</key>
<dict>
- <key>NSTemporaryExceptionAllowsInsecureHTTPLoads</key>
+ <key>NSExceptionAllowsInsecureHTTPLoads</key>
<true/>
</dict>
</dict>
[...]

All we need now is to apply this patch to your source files. While the old react-native upgrade process would have prompted you for any small difference, Git is able to merge most of the changes automatically using its 3-way merge algorithm and eventually leave us with familiar conflict delimiters:

    13B07F951A680F5B00A75B9A /* Release */ = {
isa = XCBuildConfiguration;
buildSettings = {
ASSETCATALOG_COMPILER_APPICON_NAME = AppIcon;
<<<<<<< ours
CODE_SIGN_IDENTITY = "iPhone Developer";
FRAMEWORK_SEARCH_PATHS = (
"$(inherited)",
"$(PROJECT_DIR)/HockeySDK.embeddedframework",
"$(PROJECT_DIR)/HockeySDK-iOS/HockeySDK.embeddedframework",
);
=======
CURRENT_PROJECT_VERSION = 1;
>>>>>>> theirs
HEADER_SEARCH_PATHS = (
"$(inherited)",
/Applications/Xcode.app/Contents/Developer/Toolchains/XcodeDefault.xctoolchain/usr/include,
"$(SRCROOT)/../node_modules/react-native/React/**",
"$(SRCROOT)/../node_modules/react-native-code-push/ios/CodePush/**",
);

These conflicts are generally easy to reason about. The delimiter ours stands for "your team" whereas theirs could be seen as "the React Native team".

Why introduce a new global package?

React Native comes with a global CLI (the react-native-cli package) which delegates commands to the local CLI embedded in the node_modules/react-native/local-cli directory.

As we mentioned above, the process has to be started from your current React Native version. If we had embedded the implementation in the local-cli, you wouldn't be able to enjoy this feature when using old versions of React Native. For example, you wouldn't be able to upgrade from 0.29.2 to 0.38.0 if this new upgrade code was only released in 0.38.0.

Upgrading based on Git is a big improvement in developer experience and it is important to make it available to everyone. By using a separate package react-native-git-upgrade installed globally you can use this new code today no matter what version of React Native your project is using.

One more reason is the recent Yeoman wipeout by Martin Konicek. We didn't want to get these Yeoman dependencies back into the react-native package to be able to evaluate the old template in order to create the patch.

Try it out and provide feedback

As a conclusion, I would say, enjoy the feature and feel free to suggest improvements, report issues and especially send pull requests. Each environment is a bit different and each React Native project is different, and we need your feedback to make this work well for everyone.

Thank you!

I would like to thank the awesome companies Zenika and M6 Web (archived) without whom none of this would have been possible!

Introducing Button, Faster Installs with Yarn, and a Public Roadmap

· 3 min read
Héctor Ramos
Developer Advocate at Facebook

We have heard from many people that there is so much work happening with React Native, it can be tough to keep track of what's going on. To help communicate what work is in progress, we are now publishing a roadmap for React Native. At a high level, this work can be broken down into three priorities:

  • Core Libraries. Adding more functionality to the most useful components and APIs.
  • Stability. Improve the underlying infrastructure to reduce bugs and improve code quality.
  • Developer Experience. Help React Native developers move faster

If you have suggestions for features that you think would be valuable on the roadmap, check out Canny, where you can suggest new features and discuss existing proposals.

What's new in React Native

Version 0.37 of React Native, released today, introduces a new core component to make it really easy to add a touchable Button to any app. We're also introducing support for the new Yarn package manager, which should speed up the whole process of updating your app's dependencies.

Introducing Button

Today we're introducing a basic <Button /> component that looks great on every platform. This addresses one of the most common pieces of feedback we get: React Native is one of the only mobile development toolkits without a button ready to use out of the box.

Simple Button on Android, iOS

<Button
onPress={onPressMe}
title="Press Me"
accessibilityLabel="Learn more about this Simple Button"
/>

Experienced React Native developers know how to make a button: use TouchableOpacity for the default look on iOS, TouchableNativeFeedback for the ripple effect on Android, then apply a few styles. Custom buttons aren't particularly hard to build or install, but we aim to make React Native radically easy to learn. With the addition of a basic button into core, newcomers will be able to develop something awesome in their first day, rather than spending that time formatting a Button and learning about Touchable nuances.

Button is meant to work great and look native on every platform, so it won't support all the bells and whistles that custom buttons do. It is a great starting point, but is not meant to replace all your existing buttons. To learn more, check out the new Button documentation, complete with a runnable example!

Speed up react-native init using Yarn

You can now use Yarn, the new package manager for JavaScript, to speed up react-native init significantly. To see the speedup please install yarn and upgrade your react-native-cli to 1.2.0:

$ npm install -g react-native-cli

You should now see “Using yarn” when setting up new apps:

Using yarn

In simple local testing react-native init finished in about 1 minute on a good network (vs around 3 minutes when using npm 3.10.8). Installing yarn is optional but highly recommended.

Thank you!

We'd like to thank everyone who contributed to this release. The full release notes are now available on GitHub. With over two dozen bug fixes and new features, React Native just keeps getting better thanks to you.

0.36: Headless JS, the Keyboard API, & more

· 3 min read
Héctor Ramos
Developer Advocate at Facebook

Today we are releasing React Native 0.36. Read on to learn more about what's new.

Headless JS

Headless JS is a way to run tasks in JavaScript while your app is in the background. It can be used, for example, to sync fresh data, handle push notifications, or play music. It is only available on Android, for now.

To get started, define your async task in a dedicated file (e.g. SomeTaskName.js):

module.exports = async taskData => {
// Perform your task here.
};

Next, register your task in on AppRegistry:

AppRegistry.registerHeadlessTask('SomeTaskName', () =>
require('SomeTaskName'),
);

Using Headless JS does require some native Java code to be written in order to allow you to start up the service when needed. Take a look at our new Headless JS docs to learn more!

The Keyboard API

Working with the on-screen keyboard is now easier with Keyboard. You can now listen for native keyboard events and react to them. For example, to dismiss the active keyboard, simply call Keyboard.dismiss():

import {Keyboard} from 'react-native';

// Hide that keyboard!
Keyboard.dismiss();

Animated Division

Combining two animated values via addition, multiplication, and modulo are already supported by React Native. With version 0.36, combining two animated values via division is now possible. There are some cases where an animated value needs to invert another animated value for calculation. An example is inverting a scale (2x --> 0.5x):

const a = Animated.Value(1);
const b = Animated.divide(1, a);

Animated.spring(a, {
toValue: 2,
}).start();

b will then follow a's spring animation and produce the value of 1 / a.

The basic usage is like this:

<Animated.View style={{transform: [{scale: a}]}}>
<Animated.Image style={{transform: [{scale: b}]}} />
<Animated.View>

In this example, the inner image won't get stretched at all because the parent's scaling gets cancelled out. If you'd like to learn more, check out the Animations guide.

Dark Status Bars

A new barStyle value has been added to StatusBar: dark-content. With this addition, you can now use barStyle on both Android and iOS. The behavior will now be the following:

  • default: Use the platform default (light on iOS, dark on Android).
  • light-content: Use a light status bar with black text and icons.
  • dark-content: Use a dark status bar with white text and icons.

...and more

The above is just a sample of what has changed in 0.36. Check out the release notes on GitHub to see the full list of new features, bug fixes, and breaking changes.

You can upgrade to 0.36 by running the following commands in a terminal:

$ npm install --save react-native@0.36
$ react-native upgrade

Right-to-Left Layout Support For React Native Apps

· 7 min read
Mengjue (Mandy) Wang
Software Engineer Intern at Facebook

After launching an app to the app stores, internationalization is the next step to further your audience reach. Over 20 countries and numerous people around the world use Right-to-Left (RTL) languages. Thus, making your app support RTL for them is necessary.

We're glad to announce that React Native has been improved to support RTL layouts. This is now available in the react-native master branch today, and will be available in the next RC: v0.33.0-rc.

This involved changing css-layout, the core layout engine used by RN, and RN core implementation, as well as specific OSS JS components to support RTL.

To battle test the RTL support in production, the latest version of the Facebook Ads Manager app (the first cross-platform 100% RN app) is now available in Arabic and Hebrew with RTL layouts for both iOS and Android. Here is how it looks like in those RTL languages:

Overview Changes in RN for RTL support

css-layout already has a concept of start and end for the layout. In the Left-to-Right (LTR) layout, start means left, and end means right. But in RTL, start means right, and end means left. This means we can make RN depend on the start and end calculation to compute the correct layout, which includes position, padding, and margin.

In addition, css-layout already makes each component's direction inherits from its parent. This means, we simply need to set the direction of the root component to RTL, and the entire app will flip.

The diagram below describes the changes at high level:

These include:

With this update, when you allow RTL layout for your app:

  • every component layout will flip horizontally
  • some gestures and animations will automatically have RTL layout, if you are using RTL-ready OSS components
  • minimal additional effort may be needed to make your app fully RTL-ready

Making an App RTL-ready

  1. To support RTL, you should first add the RTL language bundles to your app.

  2. Allow RTL layout for your app by calling the allowRTL() function at the beginning of native code. We provided this utility to only apply to an RTL layout when your app is ready. Here is an example:

    iOS:

    // in AppDelegate.m
    [[RCTI18nUtil sharedInstance] allowRTL:YES];

    Android:

    // in MainActivity.java
    I18nUtil sharedI18nUtilInstance = I18nUtil.getInstance();
    sharedI18nUtilInstance.allowRTL(context, true);
  3. For Android, you need add android:supportsRtl="true" to the <application> element in AndroidManifest.xml file.

Now, when you recompile your app and change the device language to an RTL language (e.g. Arabic or Hebrew), your app layout should change to RTL automatically.

Writing RTL-ready Components

In general, most components are already RTL-ready, for example:

  • Left-to-Right Layout
  • Right-to-Left Layout

However, there are several cases to be aware of, for which you will need the I18nManager. In I18nManager, there is a constant isRTL to tell if layout of app is RTL or not, so that you can make the necessary changes according to the layout.

Icons with Directional Meaning

If your component has icons or images, they will be displayed the same way in LTR and RTL layout, because RN will not flip your source image. Therefore, you should flip them according to the layout style.

  • Left-to-Right Layout
  • Right-to-Left Layout

Here are two ways to flip the icon according to the direction:

  • Adding a transform style to the image component:

    <Image
    source={...}
    style={{transform: [{scaleX: I18nManager.isRTL ? -1 : 1}]}}
    />
  • Or, changing the image source according to the direction:

    let imageSource = require('./back.png');
    if (I18nManager.isRTL) {
    imageSource = require('./forward.png');
    }
    return <Image source={imageSource} />;

Gestures and Animations

In Android and iOS development, when you change to RTL layout, the gestures and animations are the opposite of LTR layout. Currently, in RN, gestures and animations are not supported on RN core code level, but on components level. The good news is, some of these components already support RTL today, such as SwipeableRow and NavigationExperimental. However, other components with gestures will need to support RTL manually.

A good example to illustrate gesture RTL support is SwipeableRow.

Gestures Example
// SwipeableRow.js
_isSwipingExcessivelyRightFromClosedPosition(gestureState: Object): boolean {
// ...
const gestureStateDx = IS_RTL ? -gestureState.dx : gestureState.dx;
return (
this._isSwipingRightFromClosed(gestureState) &&
gestureStateDx > RIGHT_SWIPE_THRESHOLD
);
},
Animation Example
// SwipeableRow.js
_animateBounceBack(duration: number): void {
// ...
const swipeBounceBackDistance = IS_RTL ?
-RIGHT_SWIPE_BOUNCE_BACK_DISTANCE :
RIGHT_SWIPE_BOUNCE_BACK_DISTANCE;
this._animateTo(
-swipeBounceBackDistance,
duration,
this._animateToClosedPositionDuringBounce,
);
},

Maintaining Your RTL-ready App

Even after the initial RTL-compatible app release, you will likely need to iterate on new features. To improve development efficiency, I18nManager provides the forceRTL() function for faster RTL testing without changing the test device language. You might want to provide a simple switch for this in your app. Here's an example from the RTL example in the RNTester:

<RNTesterBlock title={'Quickly Test RTL Layout'}>
<View style={styles.flexDirectionRow}>
<Text style={styles.switchRowTextView}>forceRTL</Text>
<View style={styles.switchRowSwitchView}>
<Switch
onValueChange={this._onDirectionChange}
style={styles.rightAlignStyle}
value={this.state.isRTL}
/>
</View>
</View>
</RNTesterBlock>;

_onDirectionChange = () => {
I18nManager.forceRTL(!this.state.isRTL);
this.setState({isRTL: !this.state.isRTL});
Alert.alert(
'Reload this page',
'Please reload this page to change the UI direction! ' +
'All examples in this app will be affected. ' +
'Check them out to see what they look like in RTL layout.',
);
};

When working on a new feature, you can easily toggle this button and reload the app to see RTL layout. The benefit is you won't need to change the language setting to test, however some text alignment won't change, as explained in the next section. Therefore, it's always a good idea to test your app in the RTL language before launching.

Limitations and Future Plan

The RTL support should cover most of the UX in your app; however, there are some limitations for now:

  • Text alignment behaviors differ in Android and iOS
    • In iOS, the default text alignment depends on the active language bundle, they are consistently on one side. In Android, the default text alignment depends on the language of the text content, i.e. English will be left-aligned and Arabic will be right-aligned.
    • In theory, this should be made consistent across platform, but some people may prefer one behavior to another when using an app. More user experience research may be needed to find out the best practice for text alignment.
  • There is no "true" left/right

    As discussed before, we map the left/right styles from the JS side to start/end, all left in code for RTL layout becomes "right" on screen, and right in code becomes "left" on screen. This is convenient because you don't need to change your product code too much, but it means there is no way to specify "true left" or "true right" in the code. In the future, allowing a component to control its direction regardless of the language may be necessary.

  • Make RTL support for gestures and animations more developer friendly

    Currently, there is still some programming effort required to make gestures and animations RTL compatible. In the future, it would be ideal to find a way to make gestures and animations RTL support more developer friendly.

Try it Out!

Check out the RTLExample in the RNTester to understand more about RTL support, and let us know how it works for you!

Finally, thank you for reading! We hope that the RTL support for React Native helps you grow your apps for international audience!

San Francisco Meetup Recap

· 9 min read
Héctor Ramos
Developer Advocate at Facebook

Last week I had the opportunity to attend the React Native Meetup at Zynga’s San Francisco office. With around 200 people in attendance, it served as a great place to meet other developers near me that are also interested in React Native.

I was particularly interested in learning more about how React and React Native are used at companies like Zynga, Netflix, and Airbnb. The agenda for the night would be as follows:

  • Rapid Prototyping in React
  • Designing APIs for React Native
  • Bridging the Gap: Using React Native in Existing Codebases

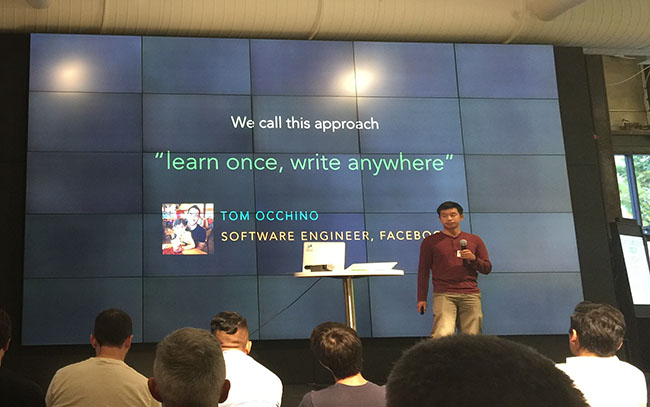
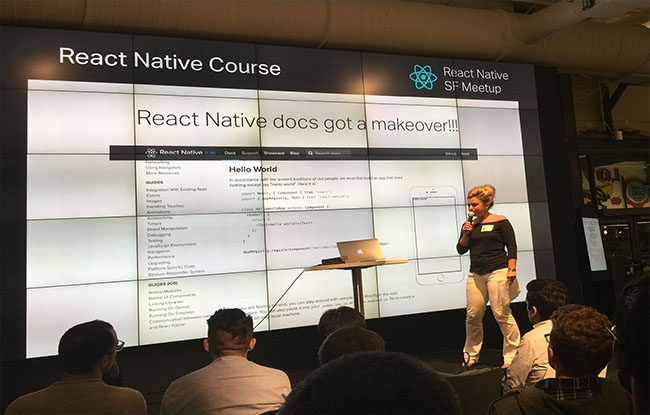
But first, the event started off with a quick introduction and a brief recap of recent news:

If one of these meetups is held near you, I highly recommend attending!

Rapid Prototyping in React at Zynga

The first round of news was followed by a quick introduction by Zynga, our hosts for the evening. Abhishek Chadha talked about how they use React to quickly prototype new experiences on mobile, demoing a quick prototype of a Draw Something-like app. They use a similar approach as React Native, providing access to native APIs via a bridge. This was demonstrated when Abhishek used the device's camera to snap a photo of the audience and then drew a hat on someone's head.

Designing APIs for React Native at Netflix

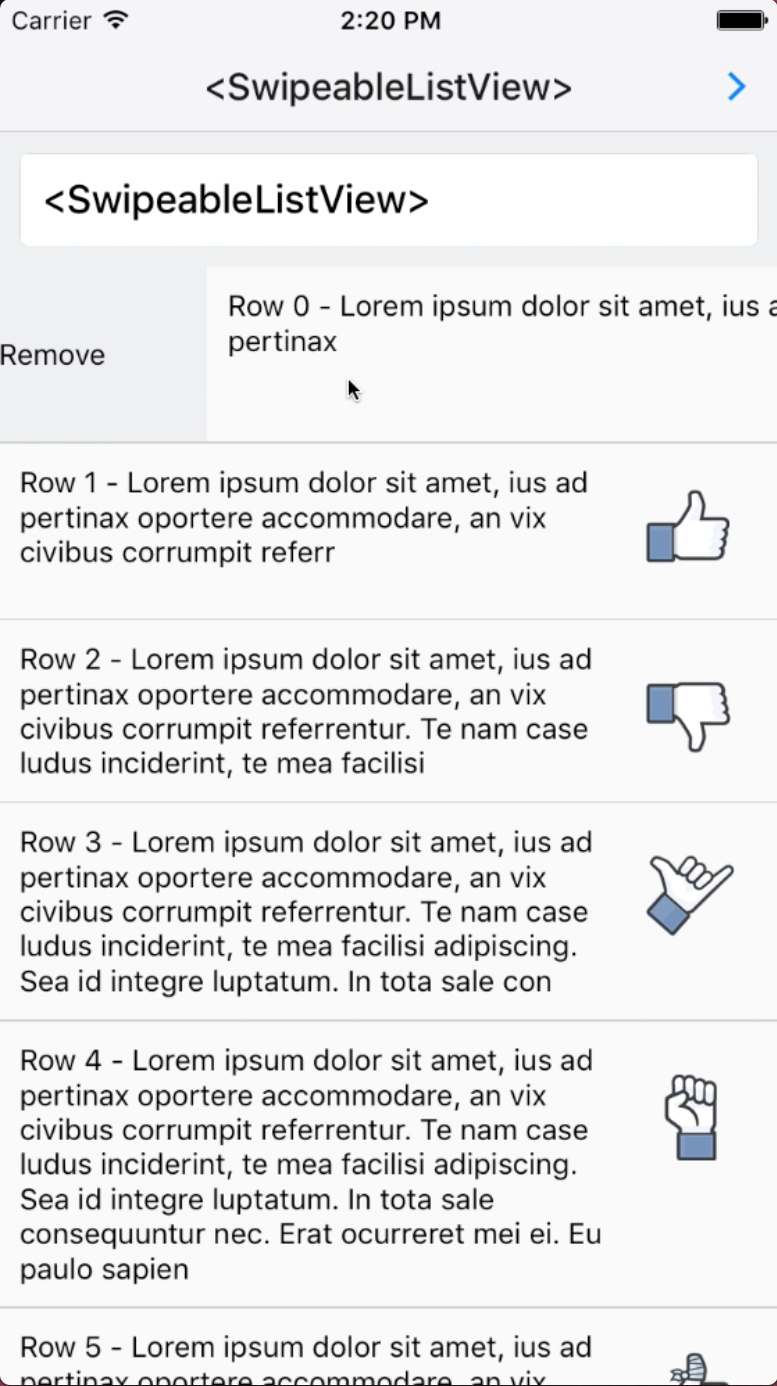
Up next, the first featured talk of the evening. Clarence Leung, Senior Software Engineer at Netflix, presented his talk on Designing APIs for React Native. First he noted the two main types of libraries one may work on: components such as tab bars and date pickers, and libraries that provide access to native services such as the camera roll or in-app payments. There are two ways one may approach when building a library for use in React Native:

  • Provide platform-specific components
  • A cross-platform library with a similar API for both Android and iOS

Each approach has its own considerations, and it’s up to you to determine what works best for your needs.

Approach #1

As an example of platform-specific components, Clarence talked about the DatePickerIOS and DatePickerAndroid from core React Native. On iOS, date pickers are rendered as part of the UI and can be easily embedded in an existing view, while date pickers on Android are presented modally. It makes sense to provide separate components in this case.

Approach #2

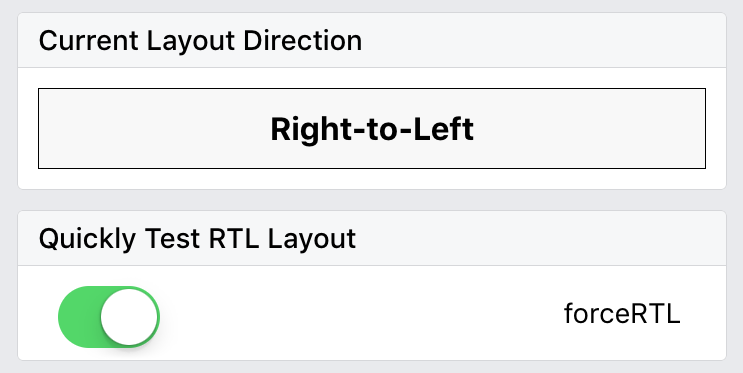
Photo pickers, on the other hand, are treated similarly on Android and iOS. There are some slight differences — Android does not group photos into folders like iOS does with Selfies, for example — but those are easily handled using if statements and the Platform component.

Regardless of which approach you settle on, it’s a good idea to minimize the API surface and build app-specific libraries. For example, iOS’s In-App Purchase framework supports one-time, consumable purchases, as well as renewable subscriptions. If your app will only need to support consumable purchases, you may get away with dropping support for subscriptions in your cross-platform library.

There was a brief Q&A session at the end of Clarence’s talk. One of the interesting tid bits that came out of it was that around 80% of the React Native code written for these libraries at Netflix is shared across both Android and iOS.

Bridging the Gap, Using React Native in Existing Codebases

The final talk of the night was by Leland Richardson from Airbnb. The talk was focused on the use of React Native in existing codebases. I already know how easy it is to write a new app from scratch using React Native, so I was very interested to hear about Airbnb’s experience adopting React Native in their existing native apps.

Leland started off by talking about greenfield apps versus brownfield apps. Greenfield means to start a project without the need to consider any prior work. This is in contrast to brownfield projects where you need to take into account the existing project’s requirements, development processes, and all of the teams various needs.

When you’re working on a greenfield app, the React Native CLI sets up a single repository for both Android and iOS and everything just works. The first challenge against using React Native at Airbnb was the fact that the Android and iOS app each had their own repository. Multi-repo companies have some hurdles to get past before they can adopt React Native.

To get around this, Airbnb first set up a new repo for the React Native codebase. They used their continuous integration servers to mirror the Android and iOS repos into this new repo. After tests are run and the bundle is built, the build artifacts are synced back to the Android and iOS repos. This allows the mobile engineers to work on native code without altering their development environment. Mobile engineers don't need to install npm, run the packager, or remember to build the JavaScript bundle. The engineers writing actual React Native code do not have to worry about syncing their code across Android and iOS, as they work on the React Native repository directly.

This does come with some drawbacks, mainly they could not ship atomic updates. Changes that require a combination of native and JavaScript code would require three separate pull requests, all of which had to be carefully landed. In order to avoid conflicts, CI will fail to land changes back to the Android and iOS repos if master has changed since the build started. This would cause long delays during high commit frequency days (such as when new releases are cut).

Airbnb has since moved to a mono repo approach. Fortunately this was already under consideration, and once the Android and iOS teams became comfortable with using React Native they were happy to accelerate the move towards the mono repo.

This has solved most of the issues they had with the split repo approach. Leland did note that this does cause a higher strain on the version control servers, which may be an issue for smaller companies.

The Navigation Problem

The second half of Leland's talk focused on a topic that is dear to me: the Navigation problem in React Native. He talked about the abundance of navigation libraries in React Native, both first party and third party. NavigationExperimental was mentioned as something that seemed promising, but ended up not being well suited for their use case.

In fact, none of the existing navigation libraries seem to work well for brownfield apps. A brownfield app requires that the navigation state be fully owned by the native app. For example, if a user’s session expires while a React Native view is being presented, the native app should be able to take over and present a login screen as needed.

Airbnb also wanted to avoid replacing native navigation bars with JavaScript versions as part of a transition, as the effect could be jarring. Initially they limited themselves to modally presented views, but this obviously presented a problem when it came to adopting React Native more widely within their apps.

They decided that they needed their own library. The library is called airbnb-navigation. The library has not yet being open sourced as it is strongly tied to Airbnb’s codebase, but it is something they’d like to release by the end of the year.

I won’t go into much detail into the library’s API, but here are some of the key takeaways:

  • One must preregister scenes ahead of time
  • Each scene is displayed within its own RCTRootView. They are presented natively on each platform (e.g. UINavigationControllers are used on iOS).
  • The main ScrollView in a scene should be wrapped in a ScrollScene component. Doing so allows you to take advantage of native behaviors such as tapping on the status bar to scroll to the top on iOS.
  • Transitions between scenes are handled natively, no need to worry about performance.
  • The Android back button is automatically supported.
  • They can take advantage of View Controller based navigation bar styling via a Navigator.Config UI-less component.

There’s also some considerations to keep in mind:

  • The navigation bar is not easily customized in JavaScript, as it is a native component. This is intentional, as using native navigation bars is a hard requirement for this type of library.
  • ScreenProps must be serialized/de-serialized whenever they're sent through the bridge, so care must be taken if sending too much data here.
  • Navigation state is owned by the native app (also a hard requirement for the library), so things like Redux cannot manipulate navigation state.

Leland's talk was also followed by a Q&A session. Overall, Airbnb is satisfied with React Native. They’re interested in using Code Push to fix any issues without going through the App Store, and their engineers love Live Reload, as they don't have to wait for the native app to be rebuilt after every minor change.

Closing Remarks

The event ended with some additional React Native news:

Meetups provide a good opportunity to meet and learn from other developers in the community. I'm looking forward to attending more React Native meetups in the future. If you make it up to one of these, please look out for me and let me know how we can make React Native work better for you!